


Whip up this high protein 2-ingredient bread for healthy meals. Quick, easy, and perfect for sandwiches or toast. Boost your protein intake effortlessly!
Hey there, my foodie friends! So, picture this: it's a Tuesday, I'm swamped, dinner needs to happen, and my healthy eating goals are screaming for attention. I stumbled upon this idea for a 2-ingredient dough, and honestly, I didn't expect that it would become my go-to for making a quick, delicious high protein Bread. It’s been a game-changer for getting wholesome meals on the table, even on the craziest days. You're going to love how simple this is!
Oh gosh, my first time making this high protein Bread, I was so excited, I completely forgot the egg wash! The bread came out looking a little... pale and sad. My husband asked if it was 'ghost bread.' Oops! Lesson learned: don't skip that golden finish. It makes all the difference, trust me. Now, I always have an egg ready!
What You'll Need to Make Our Favorite High Protein Bread
- 1 cup non-fat plain Greek yogurt: This, my friends, is the absolute star of our High protein Bread! It’s what gives our dough that incredible tang, moisture, and, of course, a massive protein punch. I always go for non-fat plain because it keeps things light, but honestly, any plain Greek yogurt works. It’s the secret sauce that makes this whole 'two-ingredient' thing possible, reacting with the self-rising flour to create magic. Don't skimp on the quality here, it makes a difference!
- 1 1/2 cups self-rising flour: Meet the other half of our dynamic duo! Self-rising flour is a must-have for this recipe because it already has baking powder and salt mixed in. That means less measuring for us, hurray! It’s the structure for our High protein Bread, giving it that lovely, fluffy texture. If you don't have self-rising, you can totally make your own with all-purpose flour, baking powder, and a pinch of salt. But for ease? Self-rising is where it’s at, always.
- 1/2 tsp garlic powder & 1/2 tsp onion powder: These two are my secret weapon for adding a savory depth that takes this bread from 'good' to 'oh my gosh, what is this magic?!' garlic powder and onion powder are like the best flavor friends, they just belong together. They infuse the dough with a warm, aromatic base that's just irresistible. I’ve tried making it without, and it's fine, but with them? It's a whole other level of deliciousness, trust me on this one.
- 1/4 tsp dried oregano & 1/4 tsp dried basil: Ah, the herbs! These give our bread that classic, comforting, almost Italian-ish vibe. Dried oregano and basil are my go-to's because they're always in my pantry and pack a lovely, fragrant punch. They add a beautiful speckle of green and a burst of herbaceous flavor that just sings. It’s amazing how a little sprinkle can transform the whole experience. These are essential for that savory, home-baked feel.
- 1/2 tsp salt & 1/4 tsp black pepper: Even though self-rising flour has salt, a little extra goes a long way to really make the flavors pop. Salt is a flavor enhancer, plain and simple. And fresh cracked black pepper? Oh, it adds that tiny bit of warmth and subtle kick that ties everything together. Don't be afraid to give it a good grind! These unassuming ingredients are crucial for balancing the richness of the yogurt and the earthiness of the herbs.
- 1 large egg & 1 tbsp water: This isn't for the dough itself, but for that gorgeous, golden, bakery-style finish! Whisking an egg with a splash of water creates an egg wash that, when brushed on, gives your bread a beautiful sheen and helps it brown perfectly in the oven. It’s that little extra step that makes this High protein Bread look as amazing as it tastes. Plus, it helps any extra seasonings stick wonderfully to the top.
Baking Up a Batch of High Protein Bread: Step-by-Step
- Step 1: Preheat Oven & Prep:
- First things first, let's get that oven roaring! Crank it up to 375°F (190°C). While it's heating, grab a baking sheet and line it with parchment paper. This little trick is a lifesaver for easy cleanup and ensures our beautiful High Protein Bread won't stick. Trust me, peeling bread off a pan is no fun, and we want this process to be as smooth as possible. Getting the oven to temperature is key for an even bake, so don't rush this part!
- Step 2: Mix Dough Base:
- Alright, time for the magic to happen! In a medium bowl, combine your Greek yogurt and self-rising flour. Now, get your hands in there! Or use a sturdy spoon, but honestly, hands work best for me. Mix until it just comes together into a shaggy, somewhat sticky ball. Don't overmix, hon, just enough until there are no dry spots of flour. This is the foundation of our amazing High Protein Bread, and it's surprisingly simple to bring together.
- Step 3: Season the Dough:
- Now for the flavor explosion! Add your garlic powder, onion powder, dried oregano, dried basil, salt, and black pepper to the dough. Knead it gently for about 1-2 minutes until all those wonderful spices are evenly distributed. You'll smell the herbs blooming, and it's just lovely. This step is where our High Protein Bread truly starts to develop its personality. Don't be shy, make sure every bit of that dough gets some seasoned love!
- Step 4: Shape the Bread:
- Lightly flour your hands this is crucial because the dough can be a bit sticky! Now, gently shape your dough into a rustic loaf or a round. I usually go for a slightly oblong shape, about 6-7 inches long. Place it onto your prepared baking sheet. You can even score the top with a sharp knife a few times, it looks pretty and helps the High Protein Bread rise evenly. Feel free to get creative with your shaping here!
- Step 5: Apply Golden Finish:
- Remember my 'ghost bread' anecdote? This is where we prevent that! In a small bowl, whisk together the large egg and water. Brush this mixture generously over the entire surface of your shaped High Protein Bread. This egg wash is what gives it that beautiful, deep golden-brown crust and a lovely sheen. If you want, sprinkle a tiny bit more salt or some everything bagel seasoning on top for extra flair. It's truly game-changing.
- Step 6: Bake Until Golden:
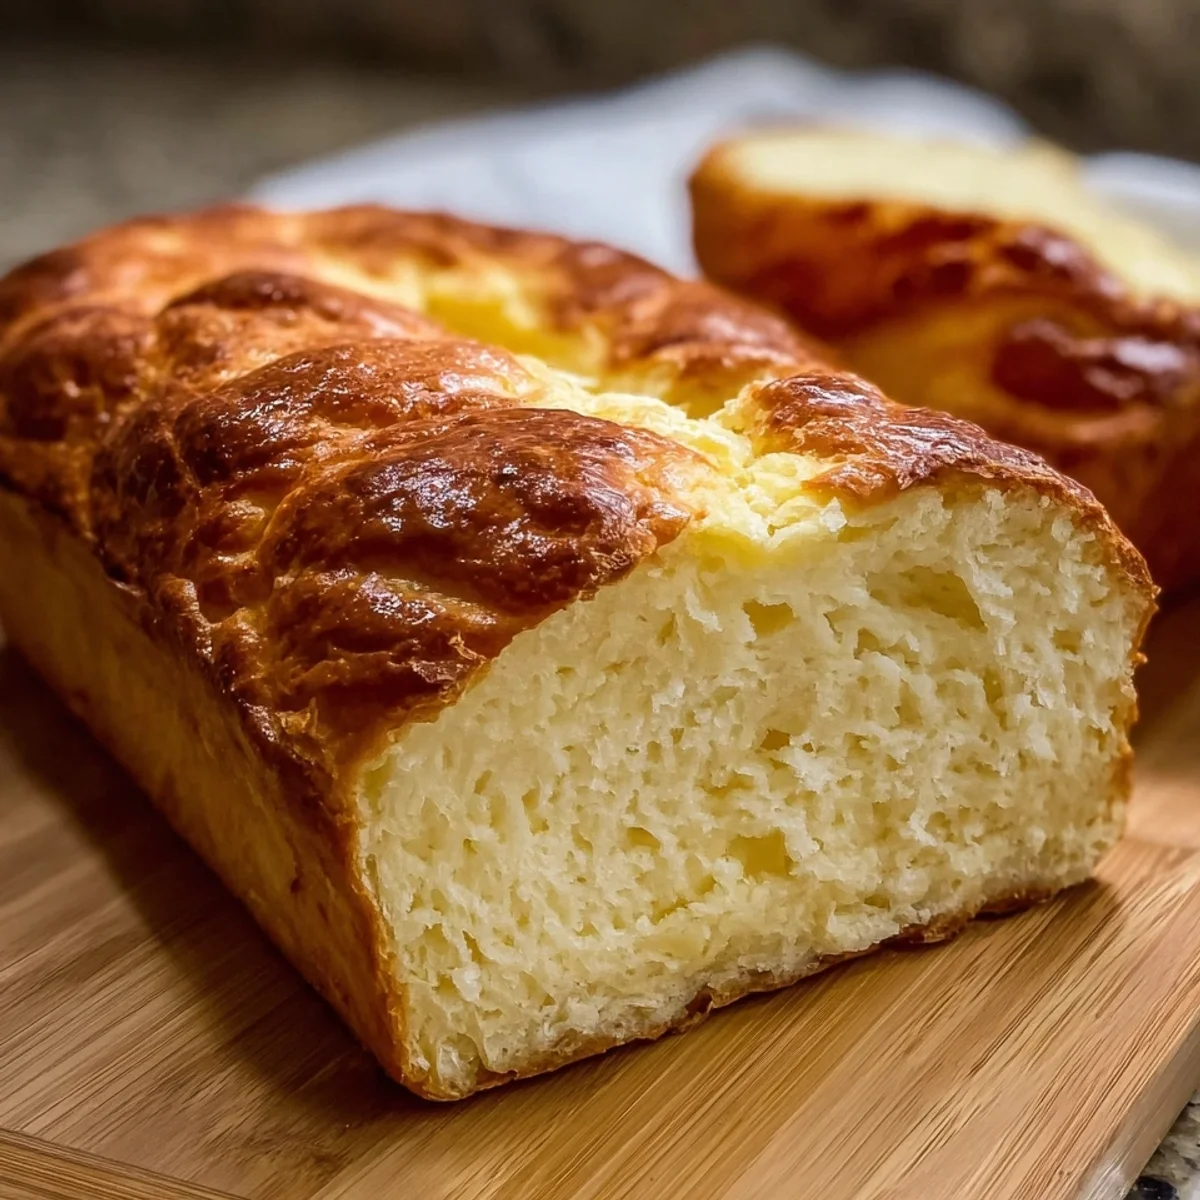
- Pop that beautiful loaf into your preheated oven. Bake for 25-30 minutes, or until it's wonderfully golden brown on the outside and sounds hollow when you tap the bottom. Every oven is a little different, so keep an eye on it around the 20-minute mark. The smell filling your kitchen will be absolutely heavenly! This is the most satisfying part, watching your simple ingredients transform into this gorgeous High Protein Bread. Once it's done, pull it out and try not to eat it all immediately!
Honestly, there's something so incredibly satisfying about pulling this bread out of the oven. The smell, the golden crust, the fact that it came from just a few simple things in my kitchen... it’s pure joy. It feels like a little victory every time, especially when I know it's a healthier option for my family. This recipe has really reminded me that delicious, wholesome food doesn't have to be complicated.
Keeping Your High Protein Bread Fresh: Storage Secrets
So, you’ve made your amazing High Protein Bread, and maybe, just maybe, you have leftovers! To keep it fresh, let it cool completely first this is vital, otherwise, condensation will make it soggy. Store it in an airtight container or a bread bag at room temperature for up to 2-3 days. I’ve made the mistake of leaving it out uncovered, and it dries out so fast, becoming crumbly and sad. You can also slice it and freeze individual pieces for up to a month. Just pop a slice in the toaster when you’re ready for a quick bite. It’s perfect for meal prep!

Swapping Ingredients for Your Perfect High Protein Bread
I've played around with this recipe so much, you wouldn't believe it! If you don't have non-fat Greek yogurt, full-fat works too, it just makes the bread a bit richer. For the flour, if you're out of self-rising, you can easily make it: for every cup of all-purpose flour, add 1.5 teaspoons of baking powder and 1/4 teaspoon of salt. I’ve experimented with adding a handful of shredded cheddar or Parmesan to the dough, which is ridiculously good. You could even swap the herbs for rosemary and thyme, or make it sweet by omitting the savory spices and adding a tablespoon of sugar and cinnamon. The possibilities for this High Protein Bread are endless!
Delicious Ways to Serve Your Homemade High Protein Bread
Oh, where do I even begin with serving this High Protein Bread? It’s so versatile! My absolute favorite way is to serve it warm, slathered with a little butter, alongside a hearty bowl of soup or chili it’s the ultimate dipper. It also makes fantastic mini sandwiches or sliders, especially with some grilled chicken or turkey. Think avocado toast on a whole new level! I love toasting slices for breakfast with a fried egg, or even just having a piece with some hummus or a fresh tomato bruschetta. Honestly, it’s good with pretty much anything savory you can dream up. Don't be afraid to get creative!
The Simple Origins of This Amazing High Protein Bread
This type of '2-ingredient dough' really exploded onto the scene a few years back, especially within the healthy eating and Weight Watchers communities. The genius lies in using Greek yogurt, which is packed with protein and a natural leavening agent when combined with self-rising flour. It's not a traditional bread-making method in a historical sense, but rather a modern, ingenious hack for creating quick, wholesome bread. I first saw it floating around on Pinterest and immediately knew I had to try it. It's a testament to how simple ingredients can come together in unexpected ways to create something truly delicious and nourishing, like this High Protein Bread.
And there you have it, folks! My absolute favorite, ridiculously easy, and super satisfying High Protein Bread recipe. It’s become a staple in my kitchen for a reason, and I hope it finds a special place in yours too. Whether you're a seasoned baker or just starting out, this recipe is a winner. Give it a try, experiment with your favorite seasonings, and please, please share your creations with me! Happy baking, my friends!

Your Burning Questions About High Protein Bread, Answered!
- Can I use regular all-purpose flour instead of self-rising?
You totally can! Just remember that self-rising flour already has leavening agents. So, for every cup of all-purpose flour, you’ll need to add 1.5 teaspoons of baking powder and 1/4 teaspoon of salt. That's the key to getting the same rise and flavor for your High Protein Bread.
- What if my dough is too sticky to handle?
Don't panic, it happens! This dough can be a bit sticky. Lightly flour your hands and your work surface. If it's still too much, add just a tiny bit more self-rising flour, a tablespoon at a time, until it's manageable. Resist adding too much, though, or your High Protein Bread might get tough.
- Can I make this bread sweet instead of savory?
Absolutely! To make a sweet version, simply omit the garlic powder, onion powder, oregano, and basil. Instead, you can add 1-2 tablespoons of sugar (or a sugar substitute) and a teaspoon of cinnamon. It’s wonderful with a sprinkle of brown sugar on top before baking. So good for breakfast!
- How long does this High Protein Bread last?
Once cooled completely, your bread will stay fresh in an airtight container or bread bag at room temperature for about 2-3 days. If you want it to last longer, I recommend slicing it and freezing the individual pieces. They toast up beautifully from frozen for a quick snack or meal.
- Why is it called 'High Protein Bread'?
Great question! The 'high protein' aspect comes primarily from the Greek yogurt. Greek yogurt is renowned for its significantly higher protein content compared to regular yogurt. This makes the bread not just delicious, but also more filling and satisfying, which is fantastic for healthy meals and snacks!
High Protein 2-Ingredient Bread for Healthy Meals
Whip up this high protein 2-ingredient bread for healthy meals. Quick, easy, and perfect for sandwiches or toast. Boost your protein intake effortlessly!
Ingredients
The Protein-Packed Dough
- 1 cup non-fat plain Greek yogurt
The Leavening Foundation
- 1 1/2 cups self-rising flour
Savory Flavor Boosters
- 1/2 tsp garlic powder
- 1/2 tsp onion powder
- 1/4 tsp dried oregano
- 1/4 tsp dried basil
- 1/2 tsp salt
- 1/4 tsp black pepper
Optional Golden Finish
- 1 large egg
- 1 tbsp water
- 1 tbsp sesame seeds
- 1 tbsp everything bagel seasoning
Instructions
-
1Preheat Oven & PrepPreheat your oven to 375°F (190°C). Line a baking sheet with parchment paper to prevent sticking and ensure easy cleanup for your High Protein 2-Ingredient Bread for Healthy Meals.
-
2Mix Dough BaseIn a medium bowl, combine 1 cup non-fat plain Greek yogurt and 1 1/2 cups self-rising flour. Mix with a spoon until a shaggy dough forms, then use your hands to bring it together.
-
3Season the DoughAdd 1/2 tsp garlic powder, 1/2 tsp onion powder, 1/4 tsp dried oregano, 1/4 tsp dried basil, 1/2 tsp salt, and 1/4 tsp black pepper to the dough. Knead gently for 1-2 minutes until the seasonings are evenly distributed throughout the High Protein 2-Ingredient Bread for Healthy Meals.
-
4Shape the BreadTransfer the dough to a lightly floured surface. Knead briefly, then shape it into a round loaf or divide into 4 smaller rolls. Place the shaped dough onto the prepared baking sheet.
-
5Apply Golden FinishIn a small bowl, whisk 1 large egg with 1 tbsp water. Brush this egg wash generously over the top of your High Protein 2-Ingredient Bread for Healthy Meals. Sprinkle with 1 tbsp sesame seeds and/or 1 tbsp everything bagel seasoning, if desired.
-
6Bake Until GoldenBake for 25 minutes, or until the bread is golden brown and cooked through. A toothpick inserted into the center should come out clean.
-
7Cool and ServeRemove the High Protein 2-Ingredient Bread for Healthy Meals from the oven and transfer it to a wire rack to cool for at least 10-15 minutes before slicing. This allows the internal structure to set.
Notes
No self-rising flour? Combine 1 1/2 cups all-purpose flour with 2 1/4 teaspoons baking powder and 3/4 teaspoon salt for a quick substitute.
This versatile bread is perfect for sandwiches, toast, or as a side with soups and salads. Try it with avocado, hummus, or your favorite lean protein.
Store leftover bread in an airtight container at room temperature for up to 2-3 days, or freeze for longer storage. Reheat gently in a toaster or oven.
Feel free to customize the savory boosters! Add a pinch of red pepper flakes for heat, or swap dried herbs for fresh ones (use 3x the amount of fresh herbs).
Equipment
Please check ingredients for potential allergens and consult a health professional if in doubt.
Nutrition Facts
It is important to consider this information as approximate and not to use it as definitive health advice.
Comments
Leave a Comment